Six Secrets to Great Improv Photos
It is a common occurrence when one photographer is admiring another photographer’s finished work to ask what camera settings and equipment was used. This is a bit like Wolfgang Puck eating at Bobby Flay’s Mesa Grill and then asking to see the recipes and a listing of equipment in the kitchen. I don’t know if chefs do that, but photographers do it all the time. It is a great way to learn and share, but this also pries into the intellectual property of an artist.
Several people have asked me what equipment I use to take photos at improv shows. While I use professional equipment, one doesn’t need expensive gear to take great photos. But when shooting conditions are less than ideal the right equipment, and more importantly skills, can make the difference between a mediocre shot and a great one that stops viewers in their tracks. Here are the secrets to my improv photos.
1. Experience
I’ve been a photographer since high school. Back then I developed my own black and white film. I interned and then worked in the production department of a local public television station. There I would sit for hours watching others work, learning from observation. Eventually I learned enough and earned enough trust to operate equipment during fundraising campaigns. In college I took cinema classes, worked in the engineering school’s video classroom, and participated in the student run TV station. After college I worked alongside a retired cinematographer from New York City making corporate videos and then went back to broadcast television where I worked with many industry veterans.
In those years I learned a lot. The big lessons were usually from my own mistakes. I learned the technical skills and practiced the art. I’m still learning today. I experiment, take workshops, and watch a lot of online tutorial videos.
2. Taking Improv Classes and Going to Shows
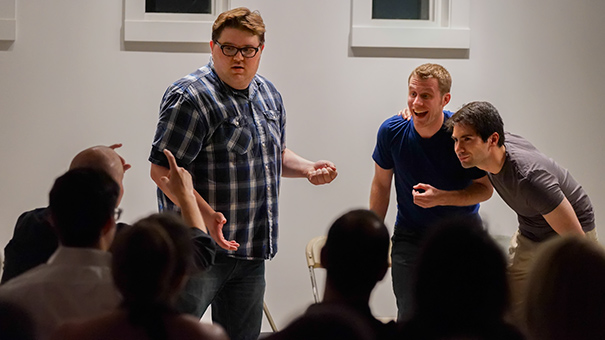
I think I have taken over a dozen improvisation classes. (I was doing it for fun, so I wasn’t keeping score.) So I know the non-rules rules for improv performances. I know when the performers are following the structure of a Harold or playing a game. It is like being a sports photographer on the sidelines of a football game. You know the rules but not the plays. You can be prepared for what could happen but still have to be on your toes because you don’t know what will happen.
I could not even guess how many improv shows I have seen. I use to volunteer to run the tech booth for shows, so I’ve seen many of the performers dozens of times. I know what their style is, how they usually play scenes. Who will be animated and run around the stage vs. those who are subtle and make a point by simply raising their eyebrow.
3. The Right Equipment
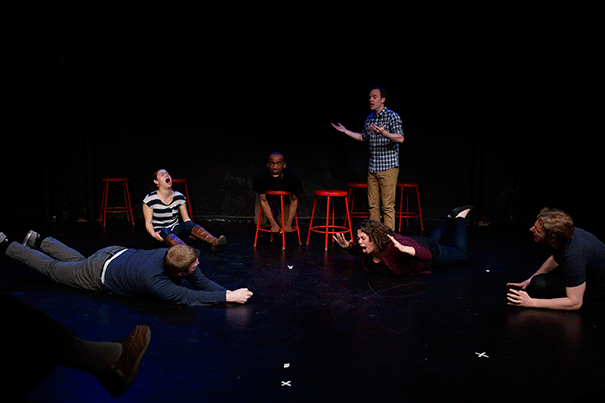
Theater lighting is designed for the human eye, not the electronic sensors of cameras. This is why most cameras cannot take theatrical photos as nice as they do in other environments. The camera I use has a wide dynamic range- the ability to capture a large number of variations between dark areas and bright areas. Black or white box theaters present lighting extremes that most consumer equipment cannot capture.
While theater lighting is rather blinding when you are on stage, it isn’t that bright from a camera’s point of view. Using a flash is not an option, so I have to increase the ISO sensitivity of my camera’s sensor. My camera can take decent photos up to about 1600 ISO without compromising quality too much. Similar cameras from other manufacturers can go to even higher ISO levels.
The lenses I use allow a large amount of light in for the sensor. This allows me an additional edge for dealing with the overall lack of light. If needed I can shoot at f/2.8. The tradeoff is a narrow depth of field that makes it difficult to keep subjects in focus. For this reason I prefer to shoot around f/5.6 or f/8.
4. Taking a Lot of Photos
For one evening of Improvapalooza performances I took 847 photos. Most of those photos were blurry or out of focus due to performer movements, were taken a fraction of a second too soon or too late in order to be the perfect shot, or were just not aesthetically interesting. Two characters talking face to face can lead to a boring show and boring photo. There are also photos that are simply not flattering to the performers. You will never see such photos.
5. Post Processing
Almost every single photo you see has been processed. Processing includes adjusting the white balance to compensate for colored lights, noise reduction to compensate for shooting at a high ISO setting, dodging and burning to compensate for extreme lighting variations, and editing the photos to fix distracting elements. Yes, some images of performers have been retouched in Photoshop. Below is an example of a photo that has had quite a bit of editing done to it.
Editing and processing photos can take a significant amount of time. I shot just over 10 hours of the District Improv Festival and spent almost 20 hours processing the photos. Commercial grade photos can take up to 8 hours or more per photo to process. There is an entire profession of Retouchers that specialize in processing photos for photographers.
6. Having Wonderfully Talented and Amazing Subjects
National Geographic can keep their arctic penguins and rain forests for all I care. Anne Geddes requires hundreds of thousands of dollars of equipment, an army of assistants, racks of wardrobe, tables of makeup, and backroom retouching artists to make her celebrity subjects look good. No such overhead is required for the Washington, DC improvisational community. These performers enjoy every moment of their time on stage. Capturing and conveying that is what allows the photos to stand out.